Post your screen-shots (PLEASE!)
This is an odd recipe, but it's an important one and has nothing to do with your coding PySimpleGUI code. Instead is has to do with modifying youre readme.md file on your GitHub so you can share with the world your creation. Doon't be shy. We all stated with "hello world" and your first GUI is likely to be primitive, but it's very important you post it any way.
In case you've not noticed, you, the now fancy Python GUI programmer that you are, are a rare person in the Python world. The VAST majority of Python projects posted on GitHub do not contain a GUI. This GUI thing is kinda new and novel for Python pbeginning rogrammers.
People / visitors love pictures
They don't have to be what you consider to be "pretty pictures" or of a "compex GUI". GUIs from beginners should be shown as proudly developed creations you've completed or are in the process of completion.
Your GitHub visitors may never have made a GUI and need to see a beginner GUI just as much as they need to see more complex GUIs. It gives them a target. It shows them someone they may be able to achieve.
The GitHub Issue Technique
This is one of the easiest / laziest / quickest ways of adding a screenshot to your Readme.md and this post on your project's main page.
Here'show you do it:
- Open a "Screenshots" Issue somehwere in GitHub. It sdoesn't matter which project you open it under.
- Copy and paste your image into the Issue's comment section. OR Drag and drop your image info the comment section. OR click the upload diaload box by clickin at the bottom on the words "Attach files by dragging & dropping, selecting or pasting them.
- A line of code will be inserted when you add a the image to your GitHub Issue's comment. The line of code will resemble this:
- Copy the line of code that is created in the comment. You can see this line when in the "Write" mode for the Issue.. If you want to see how it'll look, switch to the preview tab.
- Paste the line of code from the Issue Comment into your readme.md file located in your mtop-level FirHub folder
That's it.
Note, if you simply copy the link to the image that's created, in your readme.md file you will see only the link. The image will not be embedded into the page, only the link will be shown The thing you paste into your readme needs to have this format, theat starts with ![filename].
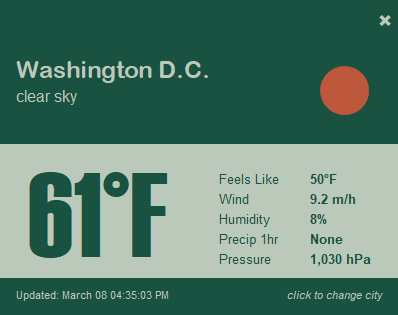
Pasting the above line directly into this Cookbook resulted in this Weahter Widget posted::
The Image Hosted Elsehwere Technique
The same technique is used as above, except in the line of code, you'll insert the URL of your image where every that may be inside the ( )
